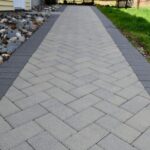
Paving slabs are a popular choice for homeowners looking to create a beautiful and durable outdoor space. Whether you’re looking to create a patio, walkway, or driveway, installing paving slabs can add both functionality and aesthetic appeal to your home. However, proper installation is key to ensuring your paving slabs last for years to come. Here are some top tips for installing paving slabs.
1. Plan and Prepare
Before you start installing your paving slabs, it’s important to carefully plan out the layout of your project. Measure the area where you’ll be installing the slabs and calculate how many slabs you’ll need. Consider the pattern and placement of the slabs to create a visually appealing design. Make sure the area is properly excavated and leveled before laying the slabs.
2. Use the Right Tools
Having the right tools for the job can make the installation process much easier. You’ll need a shovel for excavating the area, a level for ensuring the slabs are properly aligned, and a rubber mallet for tapping the slabs into place. A string line can also be helpful for keeping the slabs in a straight line.
3. Lay a Solid Base
The key to a stable and long-lasting paving slab installation is a solid base. Start by digging out the area to the appropriate depth, usually around 4-6 inches, depending on the size of your slabs. Add a layer of crushed stone or gravel as a base, compacting it with a plate compactor to ensure a firm foundation. You can also add a layer of sand on top of the base to help level the area and provide additional stability.
4. Start from the Center
When laying your paving slabs, start from the center and work your way outwards. This will help ensure a more symmetrical and professional-looking installation. Use a string line or chalk line to keep your rows straight and even.
5. Use Proper Jointing Material
Once all the slabs are in place, it’s important to properly fill the joints between them to prevent weeds from growing and water from seeping in. Use a paving jointing compound or sand to fill the gaps, making sure to sweep the material into the joints thoroughly.
6. Seal the Slabs
To protect your paving slabs from stains, dirt, and weather damage, consider sealing them with a quality sealant. This will help prolong the life of your slabs and keep them looking like new for longer.
By following these top tips for installing paving slabs, you can create a beautiful and durable outdoor space that you can enjoy for years to come. Proper planning, preparation, and attention to detail are key to a successful paving slab installation. So roll up your sleeves, grab your tools, and get started on transforming your outdoor space with paving slabs.